Here’s a very useful tip for art collectors who use a black light. Using a blacklight is part of your investing survival techniques and technology! Everyone should use a black light when inspecting and evaluating art and antiques.
This painting is leaving the lab today, after we repaired a rip in the center of the painting. It poses an interesting uv light inspection problem though… its a night scene.
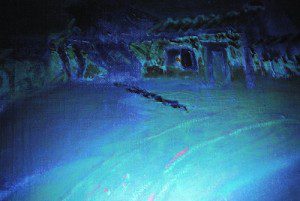
As you can see in the photo, even though its been cleaned, it still glows green. That’s because night scenes have lots of varnish usually in the paint. So, if you see a night scene glowing green when you shine your black light on it, it MAY not be because of old varnish!
One good thing about this though; the green glow makes it easier to pick out inpainting or retouchings. And this photo is a great example:
Note the purple nature of the composition of the painting. How do you tell the difference between a purple glowing original detail and the same purpleness of a retouching? Look to see if the purple color pattern follows the painting’s compositional details. If it cuts through details of the painting, its surely a repair… as in this painting.
Also note the careful exact way this inpainting was done. It was done with a small brush. That’s a hint that the conservation work/restoration work was conscientiously done.
Was this article helpful or interesting? Leave a comment please.
For more info on black lights, tips and fun videos, go to www.tipsforartcollectors.org/blacklight-package
Conservation questions? Call Scott at 805 564 3438
Appraisal questions? Call Richard at 805 895 5121
See YouTube Channel “bestartdoc”

No comments:
Post a Comment